Monday, November 2, 2015

A/V Room Drywall

Small update. I ended up drywalling the A/V room so it's close to getting done. Here's a little before and after display. If I can get it mudded/taped and painted, I can at least finalize all the wiring and build the shelving to house the future A/V gear.
Before...
Definitely looks smaller enclosed.

Tuesday, October 20, 2015

Misc. Work

Have done a lot of random projects over the past month or so. Forgot to take a bunch of before photos, but here's a mix of what I've done. First off, wall sconces. Decided to install wall sconces for accent lighting instead of some kind of rope lighting around the perimeter. Mostly 'cause I figured it would look classier, and would be a lot easier. Wiring took forever, but I think'll look good all finished.

Had to rip down the drywall to install the light/wiring.

And the other side...
Here's a random other look at the before and after of the sliding glass door at the back of the house. Finally got some plywood to finish the work below the door too. For some reason they never finished it before as that's where the deck stairs were.

Before.

After, almost.
More not terribly exciting stuff - I finished most of the wiring necessary for all the A/V hookups. Here's a look at that running through the walls and the pile of cables it created.


Next! Finishing up the osb installation in the garage. I still have to decide on if I'm going to finish it. I've been thinking of painting and staining each panel a random color. That'll definitely spice up the garage.

The left side before.

And after.

Mostly before.

And after. Those top sections were not fun to lift into place.
And yet more. I fixed up the framing of the door for the utility room, ran the electrical to the room and framed in the wall for the utility room / last bedroom. I had to tie into the power from the first floor. For some reason they only ran a single outlet off one 20 amp breaker in the kitchen, so I drilled a hole up through the basement ceiling into the wall space to tie into it.

The before, a while back. No A/V room installed yet.

Door moved to below the beam. 

Wide view from room.

Wall added to enclose room.

Monday, September 7, 2015

Theater room shelving

I wanted to create some shelving for extra gear that can't really go in the A/V room (stuff like the playstation, etc). So, I figured that building some shelves into the wasted space in the corner of the room that's been built out for the ducting would be perfect. I framed it out so I can eventually slot in a wood cabinet with shelving that will have connections for power and A/V wiring back to the tv and a/v gear.

Before. Wasted space below the ducting.

After. Framed to slot in a cabinet at the bottom.

Better look at the whole thing.

Opening for A/V room

Finally framed in the opening for the A/V room which is accessed from the hallway. After the finish work is done, I'll install a 24" louvered bifold door (this way the room will get ventilation if it gets hot). Already have the door leftover too, so I dig recycling it.

Before - the look from the hallway.

After - doorway created.

Before - inside the A/V room.

After - wiring/lighting installed too.

A look at the two recessed lights and junction box I had to wire in.
Still have to wire the electric outlets and all the a/v wiring for the room, but after that, should be all ready for drywall.

Move of electrical and expanded doorway

One of the major issues of the future theater room downstairs is that the doorway to the space opened against part of the south wall and it was also tiny, only being 30 inches wide. If I was to attempt to get a sofa downstairs it would definitely be interesting getting it through that door. So... what I did was expand the door opening for a standard 32" door, and also move the light switches for both the theater room and stairway so they made more sense and were more accessible.

Before (almost) as I've already cut to relocate the switches.

After - If you look closely you can see the wall has moved.

Wide look of the before.

And after. All the electrical moved and framework done.

Different angle.
My goal is to eventually remove that wall (seen in the last photo) that frames the laundry room and move it back, so I can add a hallway that gains access to the room past the laundry room, and to make the stairwell more open and light.

Tuesday, August 18, 2015

Hey, I did something!

After months of sitting on my behind doing pretty much nothing, I finally starting working on the house again. This time I'm tackling the framing in the basement, so things are starting to look like a room down there. Also finished off the drywall to close off the room to the utility room, but apparently I forgot to take a photo of that...

Before. Walls just foamed.

Starting the framing up to the window.

The full wall finished.

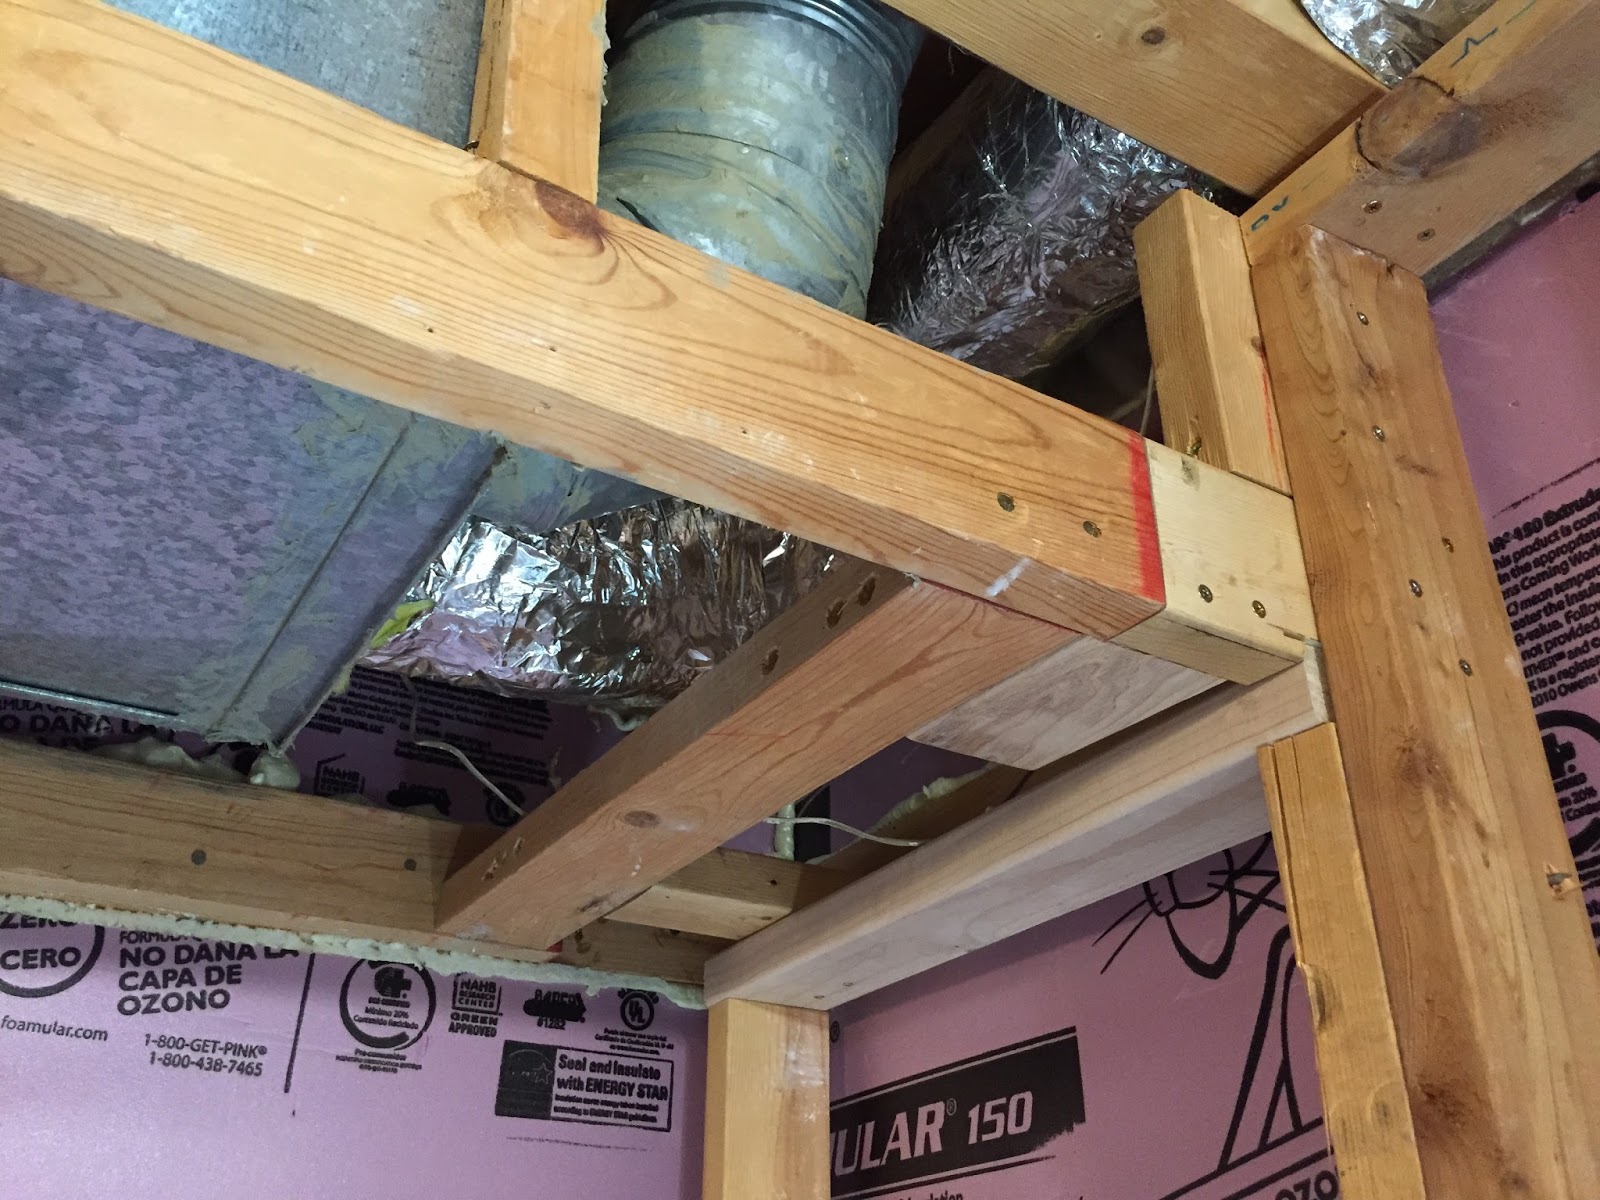
Look of the patchwork of wood to tie in the existing duct framing.
Took a few days which I'm pretty unimpressed by. I had to insulate the duct while I could get to it before framing the wall though, and working out the framing to tie into the duct framing took a little bit of thought as it just ended before the wall and didn't continue all the way.

And then I attacked the wall under the ductwork.


Sunday, May 3, 2015

Another Distraction

I've been meaning to finish up the walls in the garage for quite a while as they've been uncovered, but insulated since just after I moved into the house. Got some 15x32" thick 4'x8' sheets of OSB to start off the process to see what it'll look like and spent all weekend fastening it up. Just used some gold 1 5/8" screws and plenty of them.

Before, with most stuff cleared away.
After one day.
All 8 panels used. Still need to clean up a bit too...
So, got all the way around to the window on the left side of the garage. Will probably need 5 or 6 more to complete the rest. I tried sanding off some of the labeling too, but it was taking too long and didn't make much difference. I may clean them all up eventually and possibly varnish them to protect them / make them look fancier.