Tuesday, August 18, 2015

Hey, I did something!

After months of sitting on my behind doing pretty much nothing, I finally starting working on the house again. This time I'm tackling the framing in the basement, so things are starting to look like a room down there. Also finished off the drywall to close off the room to the utility room, but apparently I forgot to take a photo of that...

Before. Walls just foamed.

Starting the framing up to the window.

The full wall finished.

Look of the patchwork of wood to tie in the existing duct framing.
Took a few days which I'm pretty unimpressed by. I had to insulate the duct while I could get to it before framing the wall though, and working out the framing to tie into the duct framing took a little bit of thought as it just ended before the wall and didn't continue all the way.

And then I attacked the wall under the ductwork.


Sunday, May 3, 2015

Another Distraction

I've been meaning to finish up the walls in the garage for quite a while as they've been uncovered, but insulated since just after I moved into the house. Got some 15x32" thick 4'x8' sheets of OSB to start off the process to see what it'll look like and spent all weekend fastening it up. Just used some gold 1 5/8" screws and plenty of them.

Before, with most stuff cleared away.
After one day.
All 8 panels used. Still need to clean up a bit too...
So, got all the way around to the window on the left side of the garage. Will probably need 5 or 6 more to complete the rest. I tried sanding off some of the labeling too, but it was taking too long and didn't make much difference. I may clean them all up eventually and possibly varnish them to protect them / make them look fancier.

Monday, April 20, 2015

New Garage Door

To match the motif of the front door, I got a garage door to match it and work towards the goal of upping the house's curb appeal. Also got an insulated door, so I can eventually work on creating a workshop within the garage.

Before... solid heavy door.

New spiffy door with windows.

Window Trim refreshing

Along with the new front door, I've replaced the sliding glass living room door and since I did that I figured I should clean up the moulding around the living room windows as well. So, here's a few pics of the main large windows. Pulling off the old moulding I noticed that there were of course some gaps, so I ended up spray foaming them. House should be practically air-tight now.

Before.

After (still need to paint).

View with curtains added, and freakish snow storm outside.
Working on the top windows was a lot trickier, as I had to cut the moulding at odd angles (as you can see in the above picture). As my miter saw only cut up to a 50 degree angle, I had to devise a way to cut a 55 degree angle. I used my handy miter saw protractor to work out the angle I needed. I cut a bunch of test pieces to make sure I cut the correct angle (which turned out to be a must). Basically to cut a 55 degree angle, I set a square block in place for a guide and set the miter saw to a 35 degree cut. When placing the moulding straight towards the fence, the difference would make up a 55 degree cut. I had to just starting making test cuts to understand it myself (I'm old and slow nowadays).

Measure the angle. Use the "miter cut" angle.

With block in place, cutting the 55 degree angle.

Weird angles complete! 55 degree on the top left, 33 on top right.

Saturday, March 21, 2015

Curb Appeal Distraction

Been working on increasing the home's curl appeal lately, as I got the front door replaced - something I was never fond of. The moulding around the door to hide the gaps around the masonry work was terrible (the use of caulk was more than overdone). So, I had to rework the moulding around the new door to make it look a little better. It was a shame to paint over the cedar as it is naturally very pleasing, and smells nice...

Here's a look at the before and after.

The look, circa 1978.


And new, with new light!

Wednesday, January 21, 2015

A/V Room Construction

Just started this after restructuring the support wall, but here's the first shot of the new wall I've created for the A/V room. After I put this one in place, I'll remove the existing wall that framed in the utility room next to it.

So, here's the new wall in place, and the old wall that framed in the utility room removed. I installed the wall similar to all the other walls in the basement. I used construction adhesive and concrete screws to secure to the floor and used a combo of 16d and 10d common nails to secure it in place. I made the 2nd full wall about a 1/8" shorter than the shortest point to the ceiling and then used shims to secure it in place (The ceiling had a difference of almost 3/4" from the shortest to tallest point).

Utility room has some more breathing room now.
A/V room all done! (Just need to create a door opening).
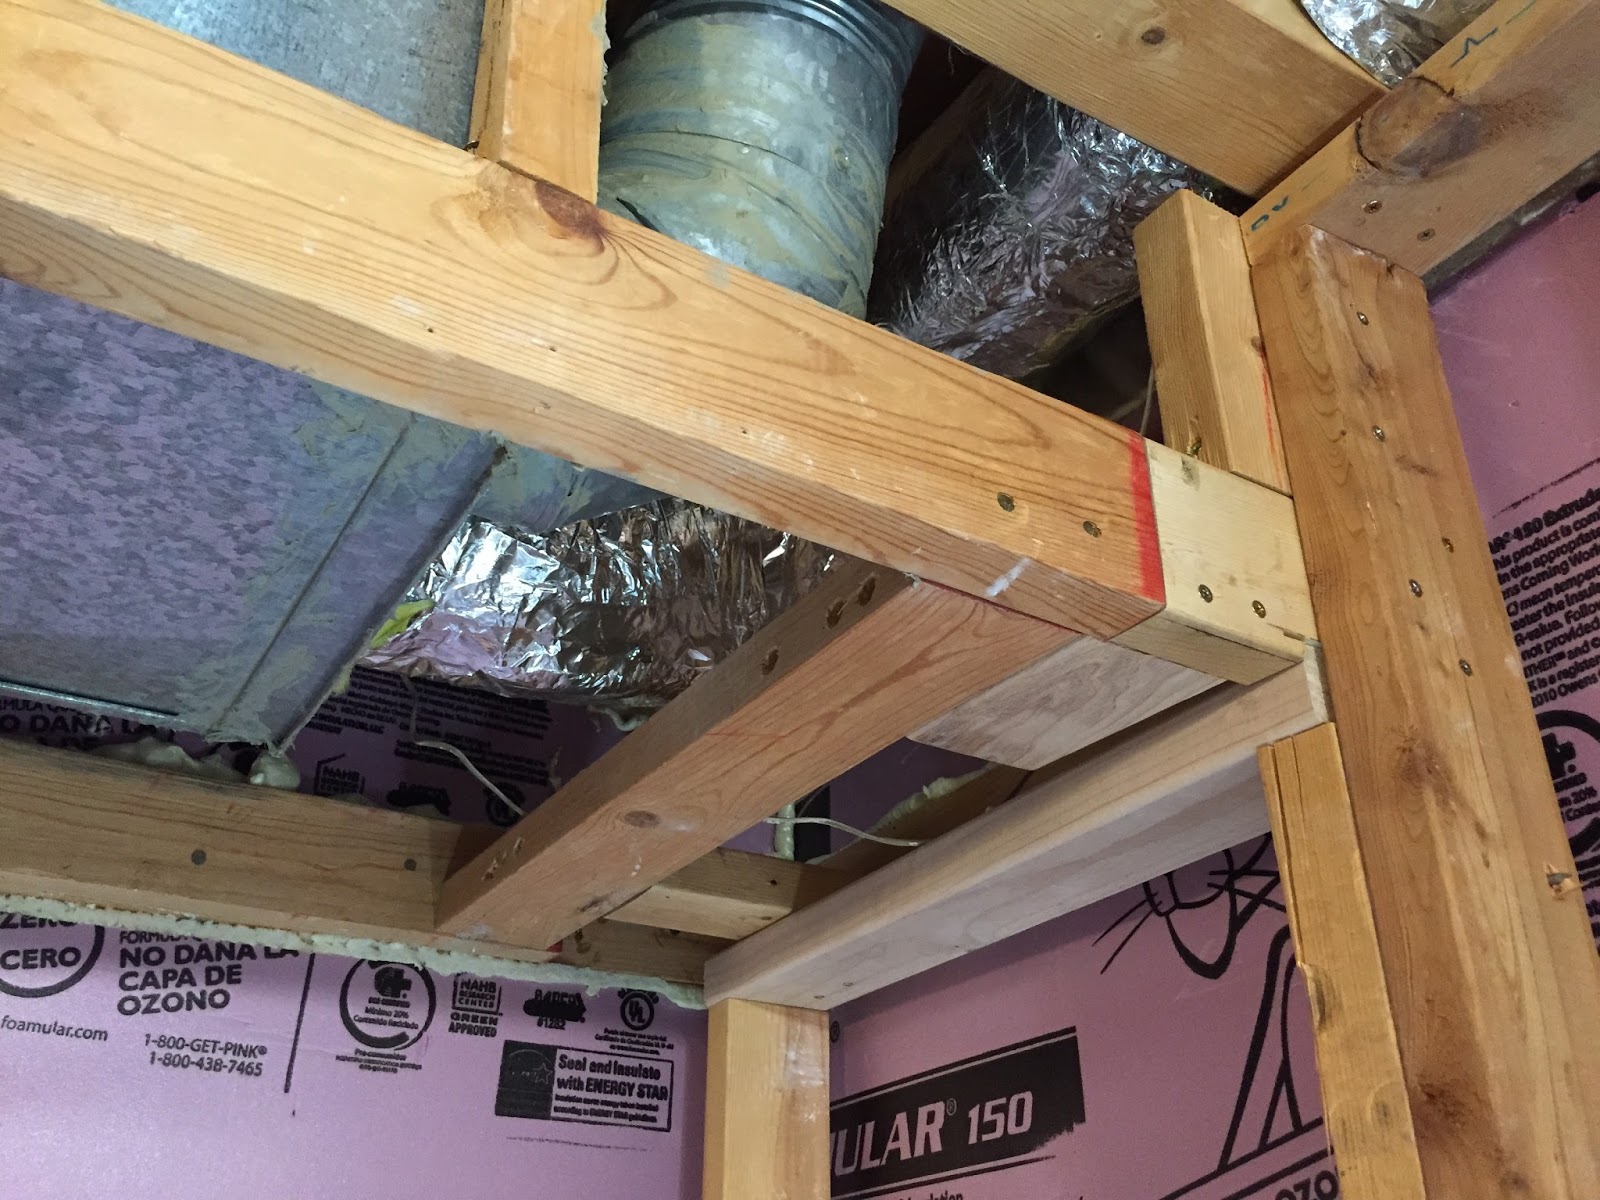
Making sure the future drywall had enough studs to attach to (where the walls/ceiling meets) was tricky, and framing in the ceiling especially, as I had to create a frame around the ductwork. In the end I was quite proud of what I created, as it worked out really well and was uber solid.

I used 2x4s as the "ceiling joists."

Closer look at the joints.
For the ceiling joists I notched out the 2x4s so that they would fit around the 2x4 wall studs (cutting out a 3 1/2" x 1 1/2" section). I then added horizontal supports for extra support for those joists, and to ensure that the drywall had something to attach to. Took a while to think through the best way to create the support, but I think it worked out really well.

A look at how the ceiling joists attached to the other side.
On the other side I just used a 2x2 to nail the joists into, then nailed that into the beam of the wall. To get it all in place I used my handy Irwin plastic clamps to hold it into place while I nailed them in securely.

Wall restructuring

As part of creating the new theater room, I need to fill in what used to be a large closet door opening and restructure the wall studs to allow for speakers, tv, etc to fit properly in the walls. As part of this, I'll also be creating a new A/V room to house all the theater room equipment and to serve as the main hub for all the network equipment, cable, etc for the house.
So, here's a look at the opening from inside the theater room.

before.
And, after...
Doesn't look like much from that side, but I had to restructure the entire span of the studs in the wall. In the center of the span of the wall, there was a main support for the beam made up of four studs, two each nailed together, and a horizontal stud to bind them all together. Since that support would mess up my plans to place a center channel speaker right in the middle of the wall, I created two similar supports on either side of this main support and also repositioned all the stud-work to be 24" on center across the whole wall. All the electric work was weaving its way through that main support too, so I moved some of it and completely removed most of it.

Main support is there in the middle where the light is.
You can see I've already filled in the opening here.
Wall completely reworked. You can see the footprint of the new A/V room here too.