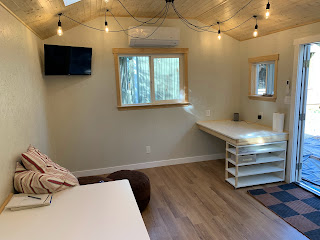
Been working on the shed, now to the point of calling it the studio, so much lately that it's been hard to think about anything else. After completing the ceiling, I moved onto lighting, flooring, window casing, moulding around the doors and baseboard.
 |
| Tiffany lights with flanking "spider" lights. |
 |
| Flooring all done and it went pretty quick. |
 |
| Small window before. |
 |
| After! |
 |
| Larger window all done. |
After all that, I had to redo the mini-split, as when I tried to set it all up, and could hear a major leak pouring into the studio. After pulling it off the wall I discovered the nylog-blue stuff all over the place (probably used too much) and one of the fittings wasn't very tight. The fix was drilling a hole through the wall for the copper pipes on the other side of the mini split, so that the fittings could be joined on the outside of the studio (instead of within the back of the unit on the inside of the studio). Then I had to pay thousands for an HVAC company to refill the unit, and test / tighten everything up properly. But... it works now. An expensive mistake.
Then - onto desk construction, which I may have over-engineered, as they are so solid I can lay ontop of them. They'll probably hold several hundred pounds without an issue, which is impressive as they are "floating" with no supports to the ground and they are only tied into the walls.
 |
| Corner clamps to keep it secure while fastening together. |
 |
| Frame all assembled. |
 |
| Support leg cutout. |
 |
| Screwed and bolted into the wall. |
 |
| Both sewing desks made. |
 |
| Not going anywhere with some 3 1/2" 1/4" bolts. |
 |
| Melamine top cut to fit ontop. |
 |
| Larger desk frame attached. |
 |
| With top. |
After that, it was all finishing work on the desks, paint and touchup of the trim work and poly on the window casings.
 |
| Made a jig to round over the table corners. (Template was a tupperware top). |
 |
| Clamped in and corner cut with a router. |
 |
| All done. Supports painted and pine wrap added. |
 |
| It floats! |
 |
| Just used melamine glue to keep the top secure. |
And now just need to make some shelving and the rest of the storage. You can see the little under-desk shelf I created that has wheels so it can move about if necessary.
 |
| Still need to make three more. This took a while. |


